
Step-by-step guide:
- Select the signature method
When signing the document, select: I don't have a qualified signature and I would like to get one.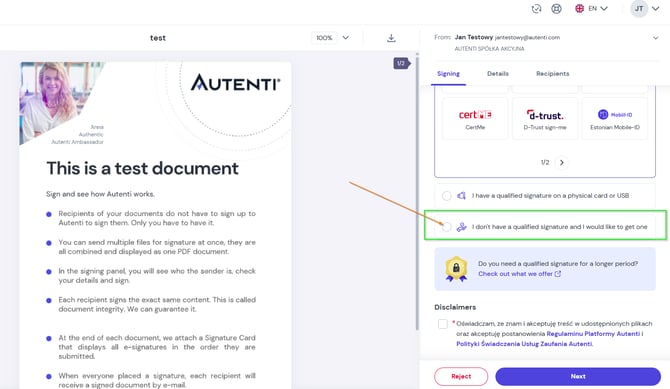
- Enter contact details
Fill in your personal details and the email address where we will send a one-time verification code.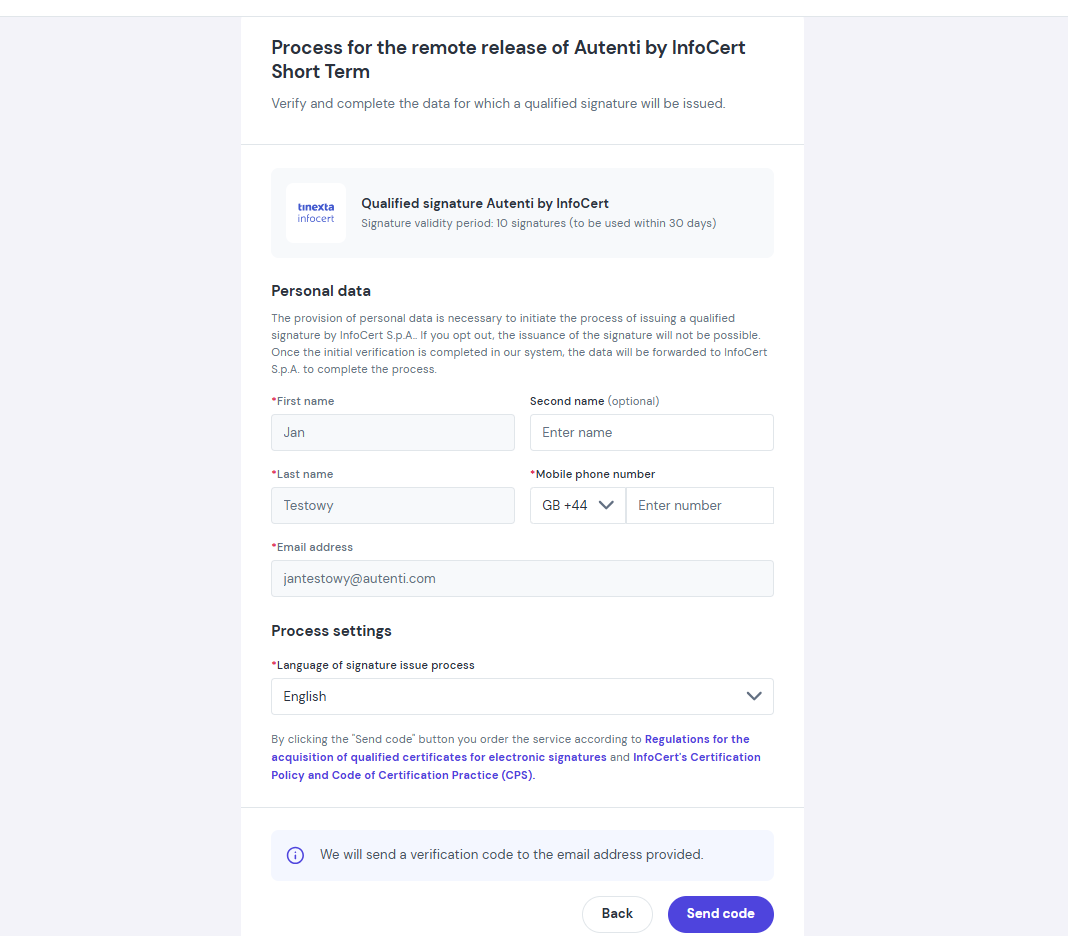
- Switch to verification on your phone
After entering the code sent to your email, you will receive an SMS with a link to complete identity verification on your smartphone. Click the link to proceed.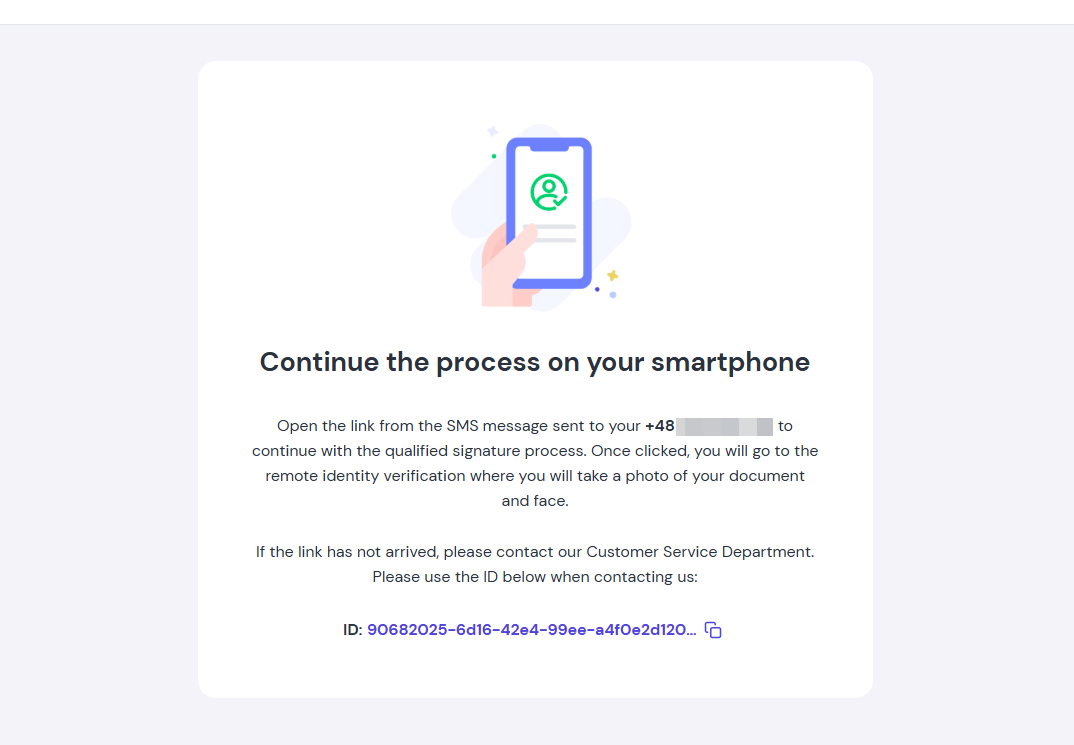
- Take a photo of your ID and a selfie
The application will prompt you to take a clear photo of your identity document (ID card or passport) and a quick selfie. - Automated identity verification
Advanced verification algorithms will compare your selfie with the photo in your document and check the authenticity of the provided data. - Submit application and set a PIN
Upon successful identity verification, you will be redirected to apply for a certificate. Confirm the application with an SMS code, then set your personal PIN code (remember it, as it will be required to approve the signature). - Sign the document
Once the short-term qualified certificate is automatically issued, you can immediately sign your document.