
Sending a Document Step-by-Step
Start the sending process - Log in to your Autenti account and click the Create document button on the main dashboard.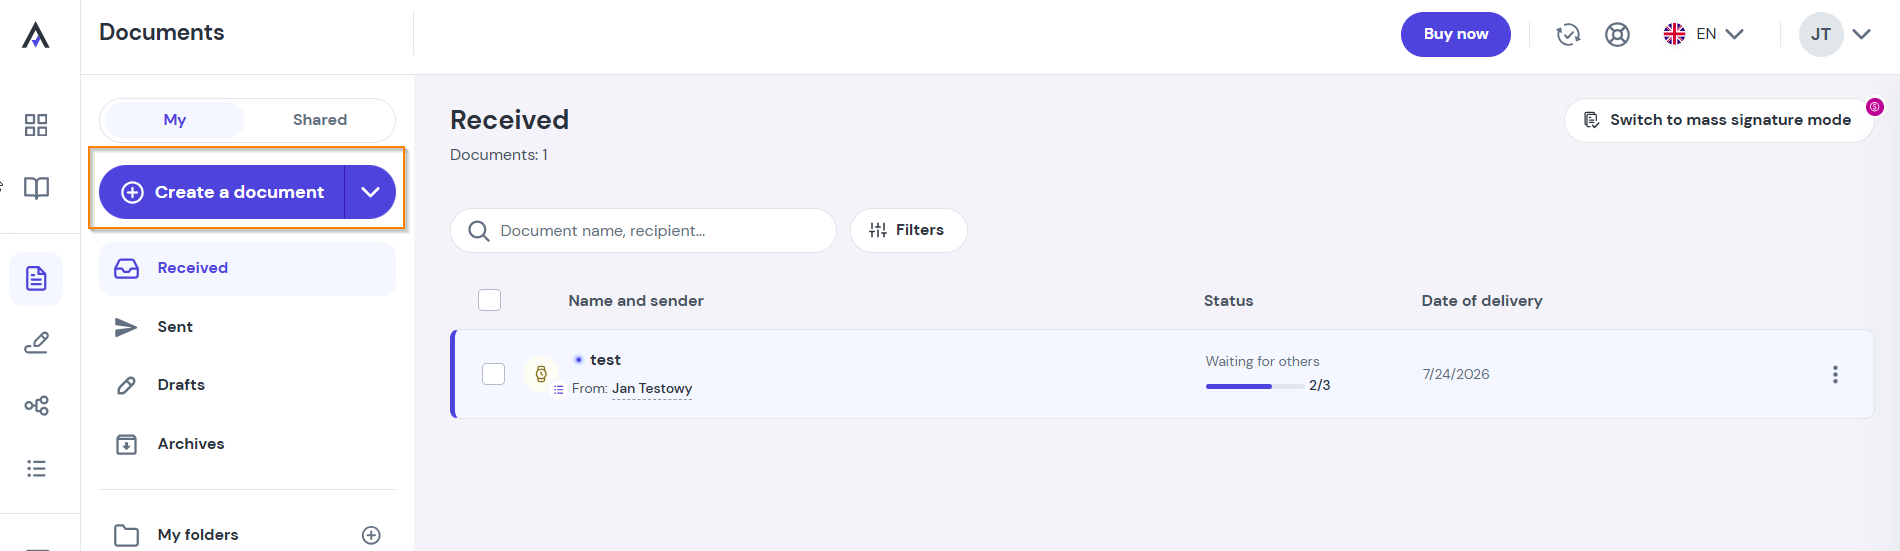
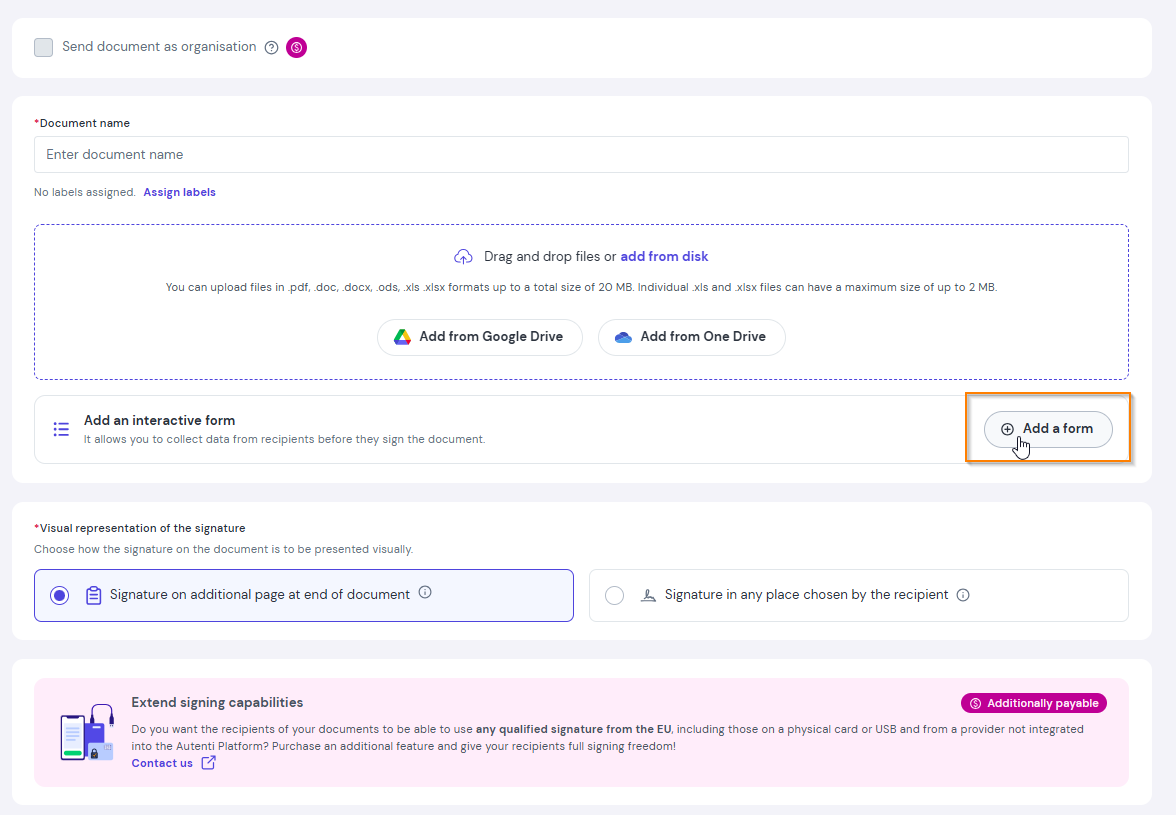
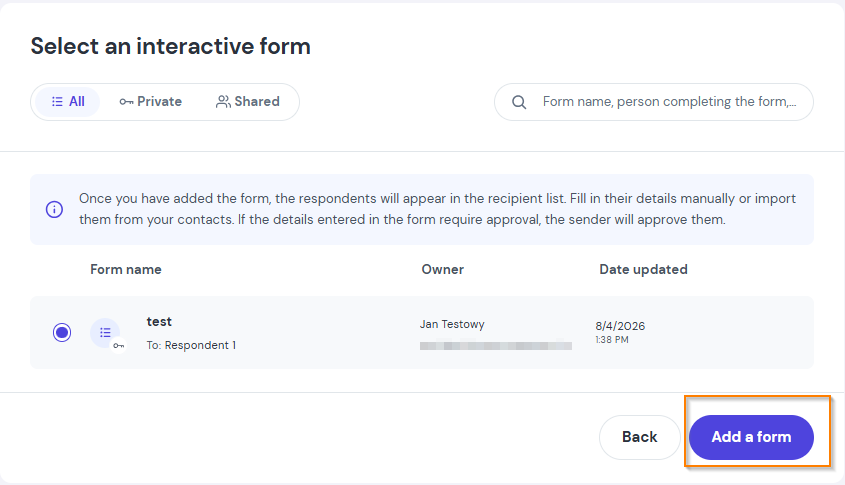
Add an interactive form- in the sending panel, click Add a form, then select the appropriate template from your list of previously prepared forms.
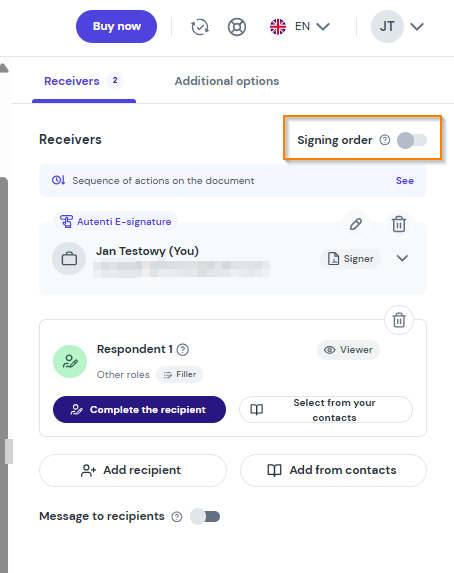
Enter recipient details
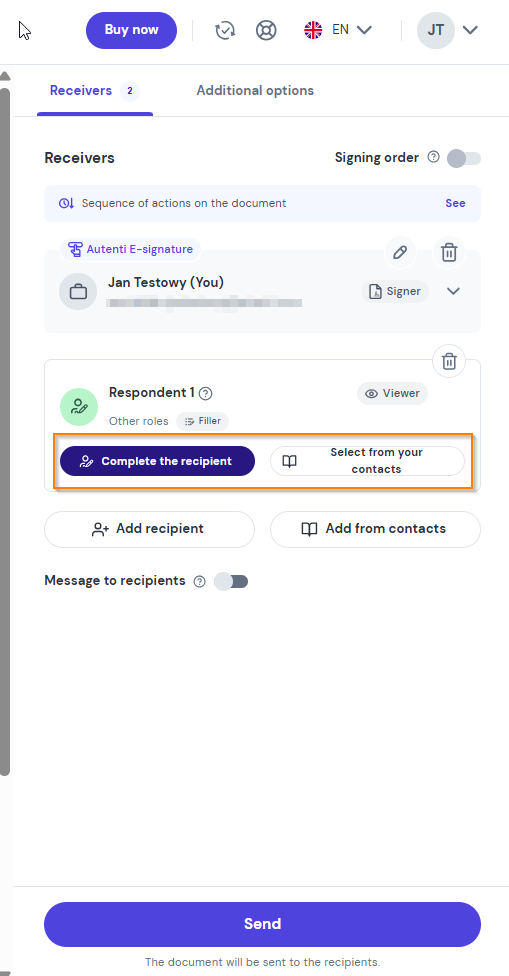
After selecting the form, the recipient list will display the roles defined in the template (called Fillers).
- Click Complete the recipient or Select from your contacts.
- Enter the email address and details of the people who need to complete and sign the document.
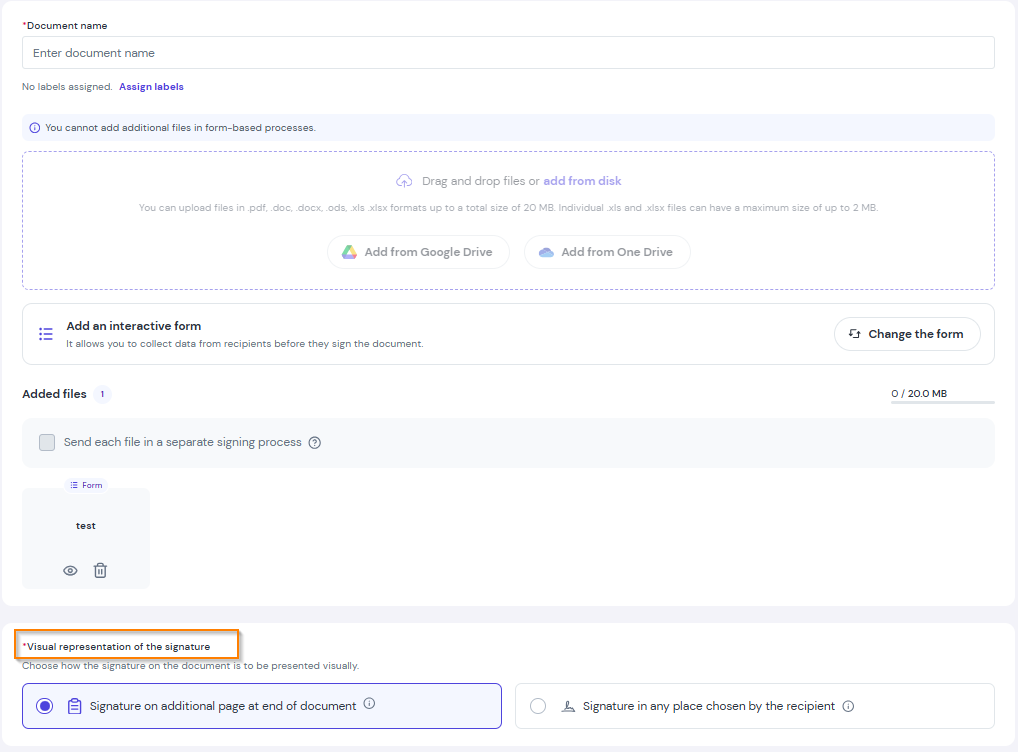
Set the signature layout
Choose where the visual signature should appear on the document:
- Signature on an additional page – The signature will be placed on a signature card, which will be an integral part of the entire document.
- Signature in any place chosen by the recipient – The recipient can apply an Autenti electronic signature or a qualified signature anywhere in the document.
Adjust additional options (optional)
-
Signing order – enable this if recipients must complete and sign the document one after another.
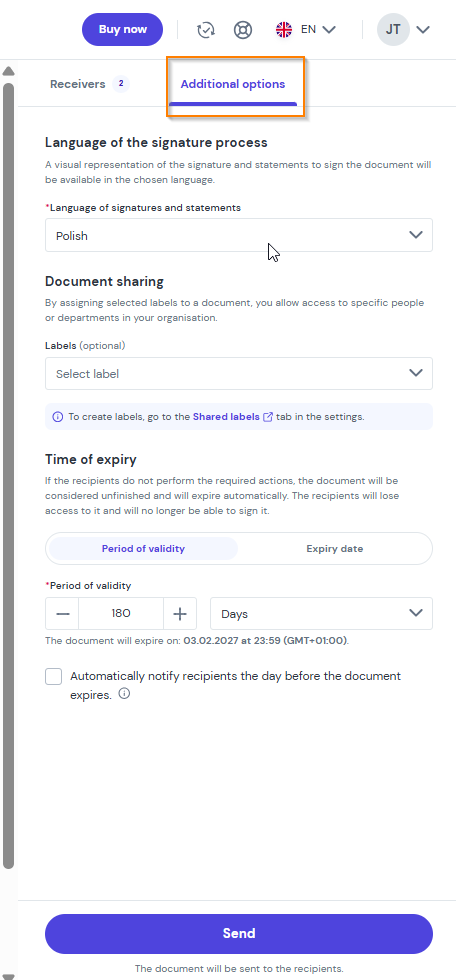
- Process language – select the language for email notifications sent to recipients.
- Document expiration time – specify the number of days allowed to sign the document (feature available from the eSign PREMIUM plan).
- Label – add a tag to easily find the document in the future.
-
Send the document- Make sure all entered details are correct, then click Send.
-
Done! Your document will be immediately delivered to the recipient.